MACHINING TUTORIAL
After a tutorial on the use of EVA machines in 3D printing, Namma invites you to discover its new tutorial on the use of CNC machining.
Follow the machining process step by step, and learn more about the use of EVA machines.
1. Preparing the model
The first step is to generate the manufacturing program. This file precisely describes the movements to be performed by the machine tool to produce the required part.
To do this, you need to use CAM/slicing software (Computer Aided Manufacturing). You can then import a STEP file from the model previously designed in CAD software (such as CATIA, SolidWorks, CREO etc.).
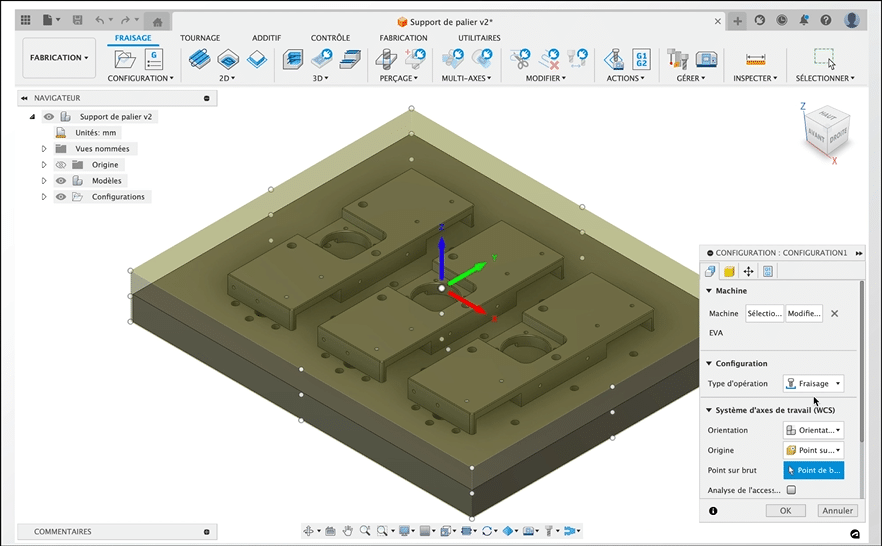
- Choose the EVA machine to be used and define the program origins. Configure your file by entering the dimensions of the raw material used.
Create the various operations to arrive at the final part. For this example, surfacing, contouring and drilling operations have been chosen. - For each operation, it is essential to select the appropriate cutting tools and define their paths (approach and clearance).
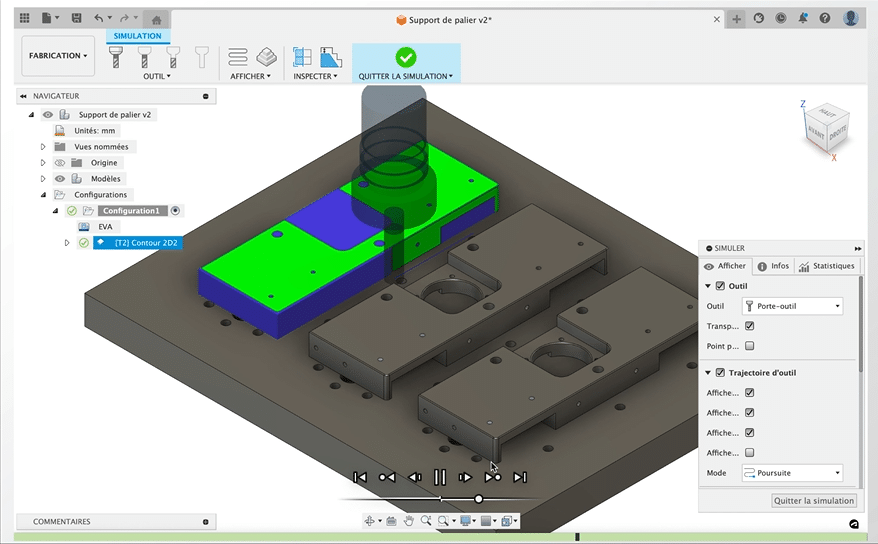
- Finally, simulate the operations to visualize the requested production. This step ensures that all requested surfaces are machined, and avoids any cutting tool collisions with the machine environment.
- Once the manufacturing file is ready, you need to generate the .gcode file using the post processor.
2. Preparing the machine
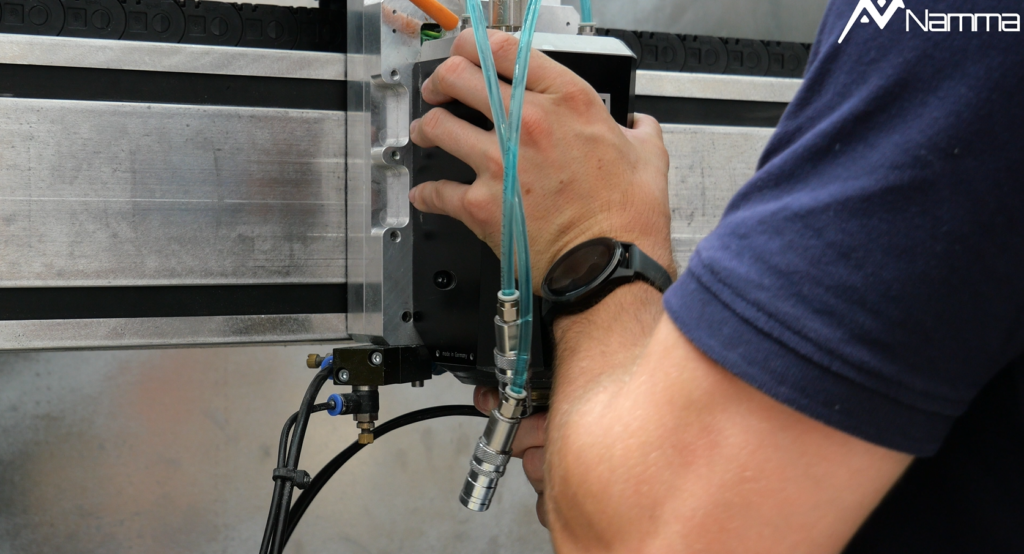
Start by installing the tool head you wish to work with. In CNC machining, you can choose between the CNC11 (for machining soft materials) and the CNC22 (for machining hard materials). Simply install it on the tool platen. Then connect the two liquid-cooling connectors to the brackets provided.
Use the N-Play control software to set up the home machine and initialize EVA.
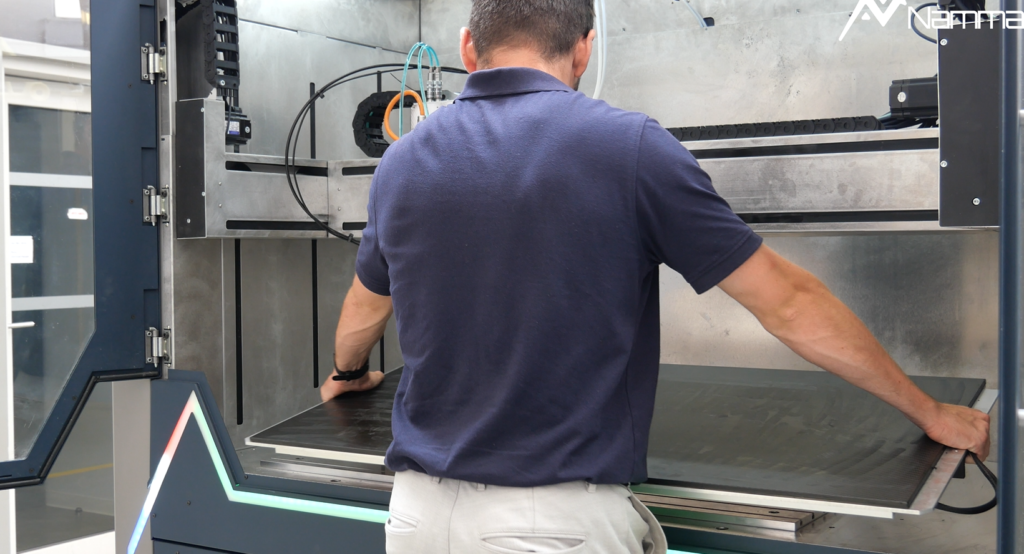
- Unplug and remove the 3D printing plate from the machine (the T-slot machining plate is located under the 3D printing plate and remains fixed in the machine).
3. Positioning and holding (MIP/MAP)
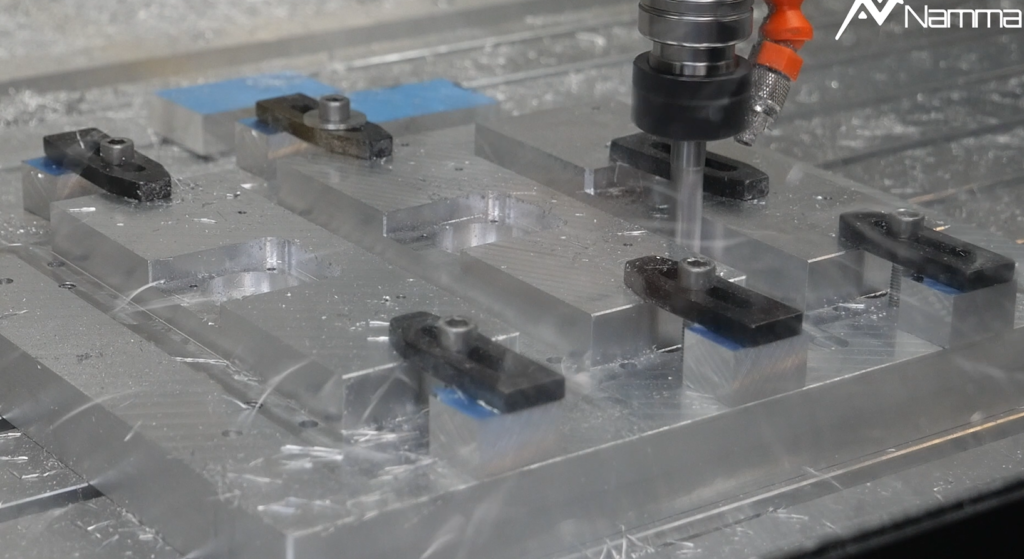
You are now going to place a tool on the table, on which you will clamp the workpieces to be machined. Tooling is used to produce several parts at the same time, saving time.
Position your tooling correctly and torque it.
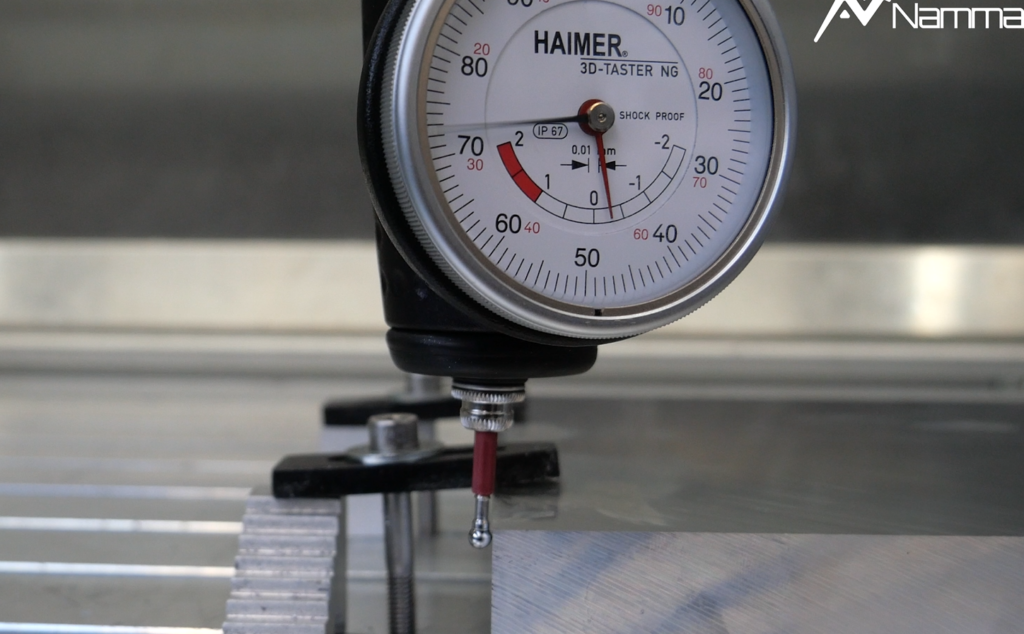
Probe the tooling using the 3D mechanical probe and N-Play to take its origins on the various X, Y and Z axes (you can also use a centering pin or tangent directly with a cutting tool).
Set the tooling origins in N-Play using the “X=0, Y=0, Z=0” buttons.
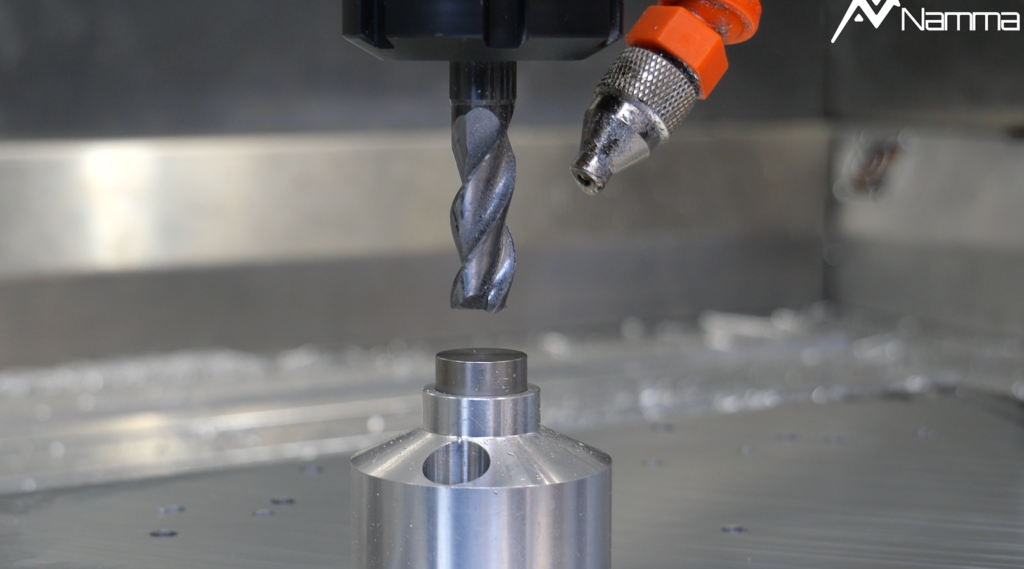
If you have chosen to use the CNC 22 tool head (with quick taper change), insert the taper with the cutting tool. For the CNC11 tool-head, the tool is placed directly on the head.
With N-Play, measure the length of the cutting tool with the tool gauge (in the corner of the table), directly integrated into the machine, so that EVA can define its length. Note: Save these values in the N-Play library for future use.
Finally, position and clamp the workpiece(s) on the tooling.
4. Start of production
Now it’s time to start manufacturing from the N-Play software.
Upstream, if you have declared micro-lubrication in the program, make sure it is active during machining. Activate the swarf deflector if you wish to extract swarf during operation.
During machining, and depending on the operation in progress, N-Play will automatically inform you to change the cutting tool.
Once you’ve finished machining, check that the dimensional dimensions of the part meet your expectations.
For a more complete overview, we invite you to view the 3D printing tutorial video available directly below.